Katy's Pizza
Pizza god Adam Kuban of SliceNY and Serious Eats had this to say the last time I made pizza: "AmGour: I love ya and all, man, but you gotta spread that dough out thinner!"
A thin crust, it turns out, is the sine qua non of perfect pizza. The great pizzas of New York--Di Fara, Franny's, and Una Pizza Napoletana--all have relatively thin crusts that don't overwhelm the other pizza elements. But, I must confess, when I'm at home making pizza my goal isn't to recreate these laudable thin-crust pizzas; my goal is to recreate my friend Katy's pizza, from the days when she lived close by in Atlanta.
You were reacquainted with Katy last week when she and her husband Josh did a Q&A for my 5th anniversary week. Their interview mentioned their jaunt guest-blogging for me back in Ought 4 and I found myself revisiting that jaunt myself, last week, when I wanted to recreate Katy's pizza.
There are two things about Katy's pizza that might horrify pizza purists (Adam Kuban!) but which make Katy's pizza the ultimate pizza comfort food to make at home: (1) it's puffy; (2) it has brown sugar in it.
Yes, it's a sweet puffy pizza. There's no other way to describe it. And I love it. It's bad for you (all that bread and sugar) but, at the same time, it's so comforting that whatever stress you're experiencing in life will instantly vanish; in that sense it's really healthy because stress is bad for you, right?
Here's what you do (and I paraphrase Katy here, so for her original words go here.) Dissolve a packet of yeast in one cup warm tap water. Add 2 Tbs of brown sugar and stir around.
In a separate bowl, mix 3 1/2 cups white flour (or, to make Katy's version: 2 cups whole wheat + 1 1/2 cups white) with 1 teaspoon of salt (I doubled Katy's amount, I'm salty) and a few handfuls of brown sugar. Now that "handful" business isn't really helpful; I think I used less brown sugar than I could have. So let's say at least 1/2 cup of brown sugar and maybe, just maybe, a full cup? Katy, what do you think about that?
Katy also adds chopped rosemary to the flour mixture, but I didn't have any. If you do, add it!
Add the yeast mixture to the dry along with 2 Tbs olive oil. Oh, you should be doing all this in your Kitchen-Aid mixer bowl with the dough hook. If you don't have that, you can do it by hand, but if you have a mixer, use it. Combine it into a big lump of dough and add some water to make it a sticky dough. Once it's smooth like a baby's bottom, dump it into a greased bowl and let rise for 2 hours with a damp towel over it.
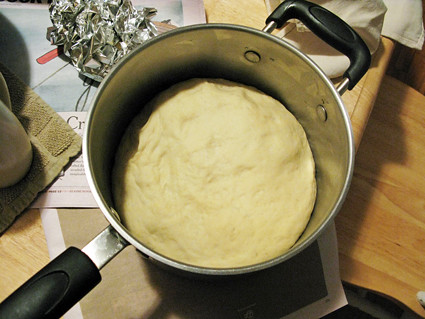
Once your dough is ready, it's pretty easy from here on in.
Well, easy if you're smart. I'm not very smart. Let me explain.
I divided the dough in two and rolled the first half on to some cornmeal and topped it with lots of toppings. I prepped some sausage, onions and mushrooms by sauteing them each individually in a little olive oil until cooked in a non-stick skillet. First the Italian sausage, which I broke up with my wooden spoon and cooked until just past pink; then onions which I sauteed (with some salt and pepper) until slightly golden brown; and then the mushrooms (also salt and pepper) which I also let get brown.
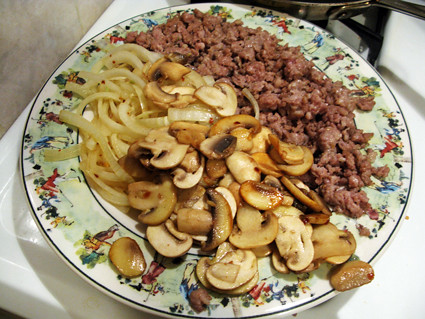
Then it was pure assembly: on to the pizza dough I spooned some Colavita-brand marinara sauce, the onions, the mushrooms, and sausage and then some fresh mozzarella which I sliced into big chunks. I added some grated Parmesan too.
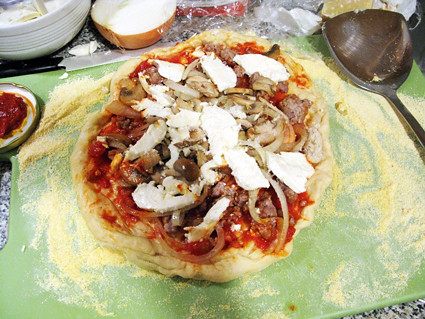
Now for the idiocy. I had my cast-iron skillet heating in a 450 oven upside down. My goal was to cook the pizza on the back of the cast-iron skillet, to simulate a pizza stone. Only problem: how to get the pizza from my cutting board, into the oven on to the cast-iron?
I attempted to lift the pizza. It was like lifting up a piece of melting plastic in the hot sun; it would dip and sag and abosolutely refuse to go anywhere. Thankfully, it was then that I remembered I had a pizza peel.
I dug it out from between the refrigerator and the counter, washed it (it was covered with dust and cat hair: mmm!), and used it to transfer the pizza to the back of the cast-iron skillet.
But the idiocy doesn't end there. The pizza was larger than the skillet, so it sagged over the sides. Once in the oven, the toppings slid off like children at a waterpark and by the time that first pizza was done (12 - 15 minutes later) there was more pizza on the floor of my oven than on top of the pizza itself.
Ugh.
Thank goodness I'd divided that dough in two. The second pizza I made fared much, much better because I cooked it inside the actual skillet. (Smart!)
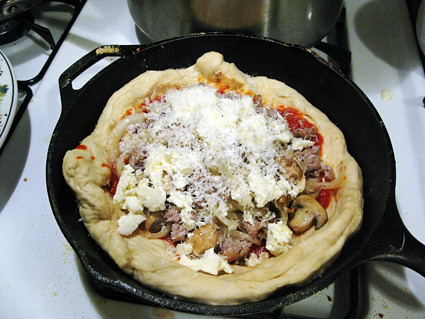
I wish I would've heeded Josh's advice, which came via e-mail after I'd already made the pizza, to get the cast iron scorchingly hot before adding the pizza. If I'd done that, I think the pizza would've had more char and character.
But as it was, it was a good old fashioned Katy pizza. Robust and satisfying, sweet from the sugar but savory with all those toppings, this is a perfect pizza to serve with a little arugula salad and cherry tomatoes:
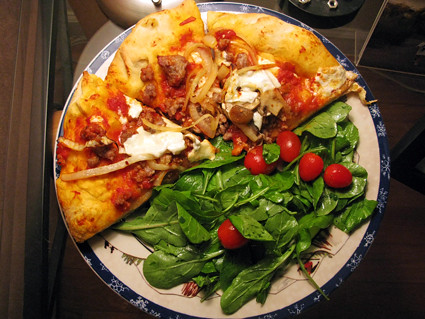
Pizza-eaters in residence agreed: this was a satisfying pizza. And super easy and cheap (cheaper than ordering in a pizza, actually.) So in these hard economic times, don't be a pizza snob: make Katy's pizza and put a smile on your face. You may not go head-to-head with Mr. DiFara (Don DeMarco) or Ms. Franny of Franny's (is there a Franny?) but you'll make the people you live with very happy on a cold, winter's night.

